Sunday, 31 July 2016

Christmas Book card


Once upon a time there was a very Special friend who deserved a very special Christmas card and this is how it turned out. At this rate I shall be finished all my Christmas cards by the end of August! 

I have used the Presscuts A4 Book die for the base of the card, gone are the days of the embossing boards to make these type of cards, well gone for me at least!

So on the left I have used the Ornate Holly Framed Peace die set and stamped with the sentiments from the John Lockwood Poinsettia Wishes stamp set. Its so handy that the words come seperately so you can rearrange them to say so many different sentiments. the corner embellishments come from the Ornate Holly Framed Peace set too.

The Poinsettia Additions die set has been introduced with just three size poinsettias in plus the open petal set to match. The sizing is different than previous Poinsettia dies, so nice to have just the three perfect sizes to work with. I stamped them all with the matching stamp set in Perfect medium and then used the Christmas Red sparkle embossing powder. The centre berries are made from the Phill Martin Sparkle PVA glue. 

Loved doing this book card today, I have another book card to show you later in the week. Have a good Sunday, thanks for dropping by x
All products used available from my website at www.maximumcrafts.com

Friday, 29 July 2016

Modern Antique


I don't usually 'do' simple, or modern, I prefer 'Vintage' and fussy but now and again its good to give different things a go. Out of your comfort zone can sometimes give your craft ideas a little boost.
 So first of all I went with a Milk card background mounted onto Antique Gold Pearl card. Then, using Double pierced squares, I have cut a small frame, one Splendid Swirl, and two leaves from the Blushing Rose die set. The flowers are also from the Blushing Rose set, background cut from Gold glitter card and the outline from Black foundation card

I have used an Arty background stamp for the 'splatter' effect, stamped with Perfect Medium and then sprinkled with Detail Gold embossing powder.

The sentiment is from the Live, Laugh, Love sentiment set also stamped with Perfect Medium and the Detail Gold embossing powder.
So a real mix of modern and antique, new and old dies and stamps. Let me know what you think 


Tuesday, 26 July 2016

A little French Fancy


I cant believe its nearly a year ago that this card featured as part of my first Card Making kit that I offered. I have offered a kit nearly every month since then, just with the exception of this month. I am busy working on the one for August though so do let me know if you are interested.
Each kit consists of dies, blank cards and envelopes, cardstock, embellishments and full instructions on how to make the months projects of two or three cards. All for only £25, delivered to your door.
This card, from last year used the French Corner, Border, Tag die set and the centre from the New York Collection Union Square. 
Kits are limited, so register your name now to get the new kit available soon 

Sunday, 24 July 2016

Warmest Wishes


When I look back at Christmas Time and recall making this card, the Warmest Wishes sentiment will take me back to the very hot weather that it was when I was making the card! Its kind of hard to think of  Christmas when its like that outside so I chose one of the most simple of designs. Its so versatile, it can be any size, just depends on your card blank size. Simply cut a circle out of the middle of a piece of Antique Gold Pearl cardstock and then emboss with, in this case Star Swirls embossing folder. I have then embossed a slightly bigger square in milk card with a Snowflake lattice embossing folder.

I have then simply die cut lots of Pine Twigs from Brunswick Green card and some of the smallest berry Sprigs. On each of the 'berries' I have dropped a bit of Berry Red Cosmic Shimmer. It was then placed all around the edge as in the photos.

Finally, I cut the sentiment 'Warmest Wishes' twice from the Antique Gold Pearl card, I think this gives an easier piece to work with. As my friend said, it looks just like a very famous stores Luxury Christmas cards, but at a fraction of the price. 

Todays recipe
Warmest Wishes die set
Pine Twigs die set
Berry Sprigs die set
Snowflake Lattice embossing folder
Star Swirls embossing folder
Antique Gold Pearl foundation cardstock
Milk foundation cardstock
Berry Red Cosmic Shimmer

Wednesday, 20 July 2016

An eternal birthday card technique


Today is a bit of a technique class for you, using Striplet dies to make a continuous background pattern. For this sample I have used the Eternal rings Striplet and the card is Foundation card in Coconut White and Lilac.

So, from the Coconut White card, I cut one of the Striplet dies without the outer edge
Then simply line up the die, matching the patterns, but with one of the long cutting edges just over the pattern.

I think you can see clearly from this photo where the cutting edge of the die is, literally right up against the edge. Tape into place and then run through your machine again.

Obviously you can keep repeating this as many times as you like but I only needed it twice for my card

I used Maddison Square die from the New York Collection to make a frame and edged with Graceful Lace Trim. The flowers are Cornflowers with a clear Dazzler for the centre and little gems from my stash for the crossover of each ring on the background.

Todays recipe
Coconut White Card
Lilac Crad
Eternal Rings Striplet die
Maddison Square die
Cornflower die
Pierced Flags die
Graceful Lace trim die
Presscuts Stitched Square die

Sunday, 17 July 2016

Santorini Bling


Seems like we are doing a Grand Tour all of our own here, earlier this week we were in Tuscany, today, Santorini beckons. I have really mixed this card with old and new dies. So we have the delicate Santorini die as the centre piece, Coconut White backed by Baby Pink. 

I have used mounting cushion in a double thickness to give a good depth before I popped the centrepiece through the centre and stuck this directly onto the base card. The sentiment is from the Pierced Flags stamp set, perfectly matching the Pierced Flag smallest die. The flower is the Perfect Peony Complete Petals die set stamped with Shaded Peony stamp set. The gorgeous leaves are from the brand new Christmas Rose die set, I am so impressed with those leaves, the detail is superb.

Just goes to show that just because its called Christmas Rose, it can be used for any occasion.

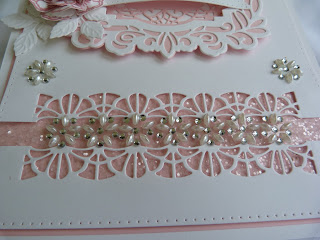
Finally, I used the Petite Mini Striplet Jubilee on the bottom directly onto the base layer and then cut down the middle. Behind the channel that this makes I have added a piece of Baby Pink card, covered in Iced Snow. Still not satified with the amount of bling that the Iced Snow gives I added some of the lovely Pearl and Diamente embellishments all along the centre of the channel, in the corners and even in the flower centre. A girls got to have a bit of bling! 
Items available on my web site www.maximumcrafts.com


Friday, 15 July 2016

Double Diamonds works wonders


Do you remember that advert 'Double Diamond works wonders' ? It was for a beer, way back, and when I made this diamond easel card that little catchphrase sprang to mind. Pastel colours are my comfort zone so I went for a selection rather than just the one, layered using the Double pierced Squares die sets both A and B. This gives a very narrow, 1/8th" border all the way round which I personally really like.

The centre piece is made from Maggie, she is so delicate! Behind Maggie I have used a couple of Beaded Flourishes and then the flowers come from the Petite Peony cluster set with some crystal gems in similar colours to the card I used

Look at the fine detail of Maggie, its so pretty. For the centre, I cut the outer circle from Coconut White card and added a piece of double sided adhesive sheet and used Diamond Sprinkles allover before adding the final lattice circle. Lots of dimension achieved with mounting cushion.
 All easel cards need an anchor to hold the easel up and the Petite Peony Cluster die fits the job just perfectly. Adding the extra peony flowers, again all from this die set on the top of the cluster to form a secure anchorage. In this last photo you can clearly see how close together the borders can be when using the two sets of Double Pierced square dies together.

Wednesday, 13 July 2016

In love with Tuscany


Tuscany must be lovely at this time of year, well, any time of year really, its definately on my bucket list. For now, I will have to make do with a card made using the Italian Collection Tuscany die set, a beautiful thing in its own right.

Apart from the Tied Together embossing folder the Tuscany die set is the only die used on this card. I have layered the different die shaps the whole way up to give dimension. with the centre rose die, I used the pointed end of a Smoothie with Colour Cloud ink Lavender Lace to show up the roses, simply by spongeing over them. The sentiment is from Phill Martin.

Top corner and final embellishment, is a double ribbon from CE in Amethyst and two, ready made hat pins just poked in to give a little added elegance.
Hope you liked todays trip to Italy! 


Sunday, 10 July 2016

Twas the night before Christmas


Doesn't this look like the most perfect Christmas scene? All quiet and peaceful with a beautiful starry sky and a sprinkling of snow. This card is so effective but using the Starry Night die and the Christmas Cottage scene dies its so easy to do.
Run the Starry Night Sky die through with black card, and the two Christmas cottage scenes in Coconut White, I felt Bright White was a bit harsh so went for a softer white. Using the Double pierced circle dies, I cut two circles the same size and then, from the middle, one smaller die was cut out and on the other an even smaller circle, giving a graduated frame. The background is embossed with the Snowflake Lattice embossing folder.

Look at the detail that these dies give you! So lovely and I have added a sprinkling of diamond Snow to the rooftops and trees too. The close up shows the detail in the Starry sky too, just one cut of the die and you have all this detail, brilliant!

Final embellishment is the poinsettia in opposite corners. I used the Poinsettia Additions collection. I have the Classic Poinsettia dies from last year, but to have the open and closed petals plus the leaves all the same smaller set was so handy. They are a different size to the Classic collection too, so a real 'Addition' to my collection. The Holly branch was used as the back piece. Crystal stars were added to the other two opposite corners. Glad its not really the night before Christmas, but it wont be long!

Todays recipe
Double Pierced Circle dies
Snowflake Lattice embossing folder
Starry Night die
Christmas Cottage Scene dies
Poinsettia Additions die
Holly Branch die
Diamond Sprinkles
Crystal stars
Coconut White and Black Foundation card

All items available from my website at www.maximumcrafts.com

Friday, 8 July 2016

For my friends


I am dedicating this card to all my friends today, who have given me so much support and care over the last few weeks, which has been a very difficult time. The beautiful cards I have received are so very special that I needed to show you this card as a joint 'Thank You' to everyone.

The card is a 3d card, with a thin spine to allow for the depth of the flowers. Very natural colours, Milk and Papyrus foundation card along with a green from my own stash. I have used the following dies
Grace 
Greek Collection Corner, Border, tag
Orange Blossom Complete Petal
Shaded Orange Blossom stamp set
Magical Butterflies
Elegant sentiment stamp set
All available from my website at www.maximumcrafts.com


Wednesday, 6 July 2016

Heraldic card

This card is one from a workshop a few weeks ago using the Justrite Peonies set. We made three cards altogether and I really couldn't decide which one was my favourite. On this one, the background was embossed using the Couture Creations embossing folder, then I die cut an Heraldic Square from Coconut White and popped that into the centre. The stamps from Justrite are so detailed and always stamp like a dream. So, simply onto Coconut White card I stamped the images three times, coloured in with Copic markers and die cut them out, arranging them along the bottom edge of the square. I added quite a bit of mounting cushion of various depths to the back to give a much deeper appearance. Crystal corner embellishments and a simple sentiment, and It was good to go as they say.
I have a few sets of the matching stamps and dies on a special sale offer over on my website, www.maximumcrafts.com 

Tuesday, 5 July 2016

Pretty in Pink


Do you have a favourite colour? Mine is pink and so I indulged myself whilst making this card for a friends birthday. I have used Milk Foundation card and embossed it with the Butterfly Dreams embossing folder and then I rubbed Blossom gilding wax all over the surface which enhanced the butterflies beautifully.


The wonderful piece of bling in the centre of the ribbon is a Pearl and Diamante charm from the Always and Forever collection, and does it sparkle! It is sooo pretty and needed to be in centre stage I felt. Married with a satin edged pink ribbon it sets the card off nicely.


Finally, I used a striplet underneath the bow and the sentiment and oval frame are from Justrite, items available on my website Maximumcrafts


Sunday, 3 July 2016

Its not just for Christmas!


The brand new Festive Collection of dies by Sue Wilson was launched just over a week ago and there are some beauties amongst them! Even though, I cant help but feel that July is still a tad too early to be thinking of Christmas but that still doesnt stop me from trying out some of the new stash.
So I have teamed Ray of Light with Aurora Star to make a normal birthday card.

I cut the Ray of Light out twice, once in Black card stock and then again in Bright Gold Foundation cardstock slightly off setting the two to give the illusion of shadow. The outer die from the Aurora Star die was used to cut out a black star and then the good old favourite, Pierced Flag die set, was used for the fabulous sentiment banner. A flourish of black Dazzler setting and black pearls peppered along the rays finished off the very simple card
  
Finally I just wanted to highlight the beautiful detail from the Ray of Light die as shown in the last photo. The embossed lines down each ray ends with a delightful flurry of debossed speckles, so effective and not just for Christmas

Recipe used today
Ray of Light die
Aurora Star die
Pierced Flags die
Elegant sentiments stamp set
Self Adhesive Black pearls
Embellishment from CE
Foundation card stock - Bright Gold, Black and Milk

all available from Maximumcrafts


Sunset in Africa

Sunset In Africa I really enjoyed making this card, its so different and yet quite simple to achieve with the combination of the ...